# Quiz
1. 우리가 word2vec(혹은 GloVe 등등) 를 하는 궁극적인 목표는 context word가 인풋되었을 때, 어떤 단어가 target인가 아는 것도 중요하지만 더 중요한건 word embedding matrix를 학습하는 것이다.

# Programming Assignments
1. if ~ continue
# GRADED FUNCTION: complete_analogy

def complete_analogy(word_a, word_b, word_c, word_to_vec_map):
    """
    Performs the word analogy task as explained above: a is to b as c is to ____.

    Arguments:
    word_a -- a word, string
    word_b -- a word, string
    word_c -- a word, string
    word_to_vec_map -- dictionary that maps words to their corresponding vectors.

    Returns:
    best_word --  the word such that v_b - v_a is close to v_best_word - v_c, as measured by cosine similarity
    """

    # convert words to lowercase
    word_a, word_b, word_c = word_a.lower(), word_b.lower(), word_c.lower()

    ### START CODE HERE ###
    # Get the word embeddings e_a, e_b and e_c (≈1-3 lines)
    e_a, e_b, e_c = word_to_vec_map[e_a],word_to_vec_map[e_b],word_to_vec_map[e_c]
    ### END CODE HERE ###

    words = word_to_vec_map.keys()
    max_cosine_sim = -100              # Initialize max_cosine_sim to a large negative number
    best_word = None                   # Initialize best_word with None, it will help keep track of the word to output

    # to avoid best_word being one of the input words, skip the input words
    # place the input words in a set for faster searching than a list
    # We will re-use this set of input words inside the for-loop
    input_words_set = set([word_a, word_b, word_c])

    # loop over the whole word vector set
    for w in words:
        # to avoid best_word being one of the input words, skip the input words
        if w in input_words_set:
            continue

        ### START CODE HERE ###
        # Compute cosine similarity between the vector (e_b - e_a) and the vector ((w's vector representation) - e_c)  (≈1 line)
        cosine_sim = cosine_similarity(e_b - e_a, word_to_vec[w] - e_c)

        # If the cosine_sim is more than the max_cosine_sim seen so far,
            # then: set the new max_cosine_sim to the current cosine_sim and the best_word to the current word (≈3 lines)
        if cosine_sim > max_cosine_sim:
            max_cosine_sim = cosine_sim
            best_word = w
        ### END CODE HERE ###

return best_word-
만약 (w in input_words_set) 을 만족하면 continue가 적용되어 continue 아래의 코드를 실행시키지 않는다. 그러면 바로 다음 loop 을 도는 것.
2. Neutralize for non-gender specific words
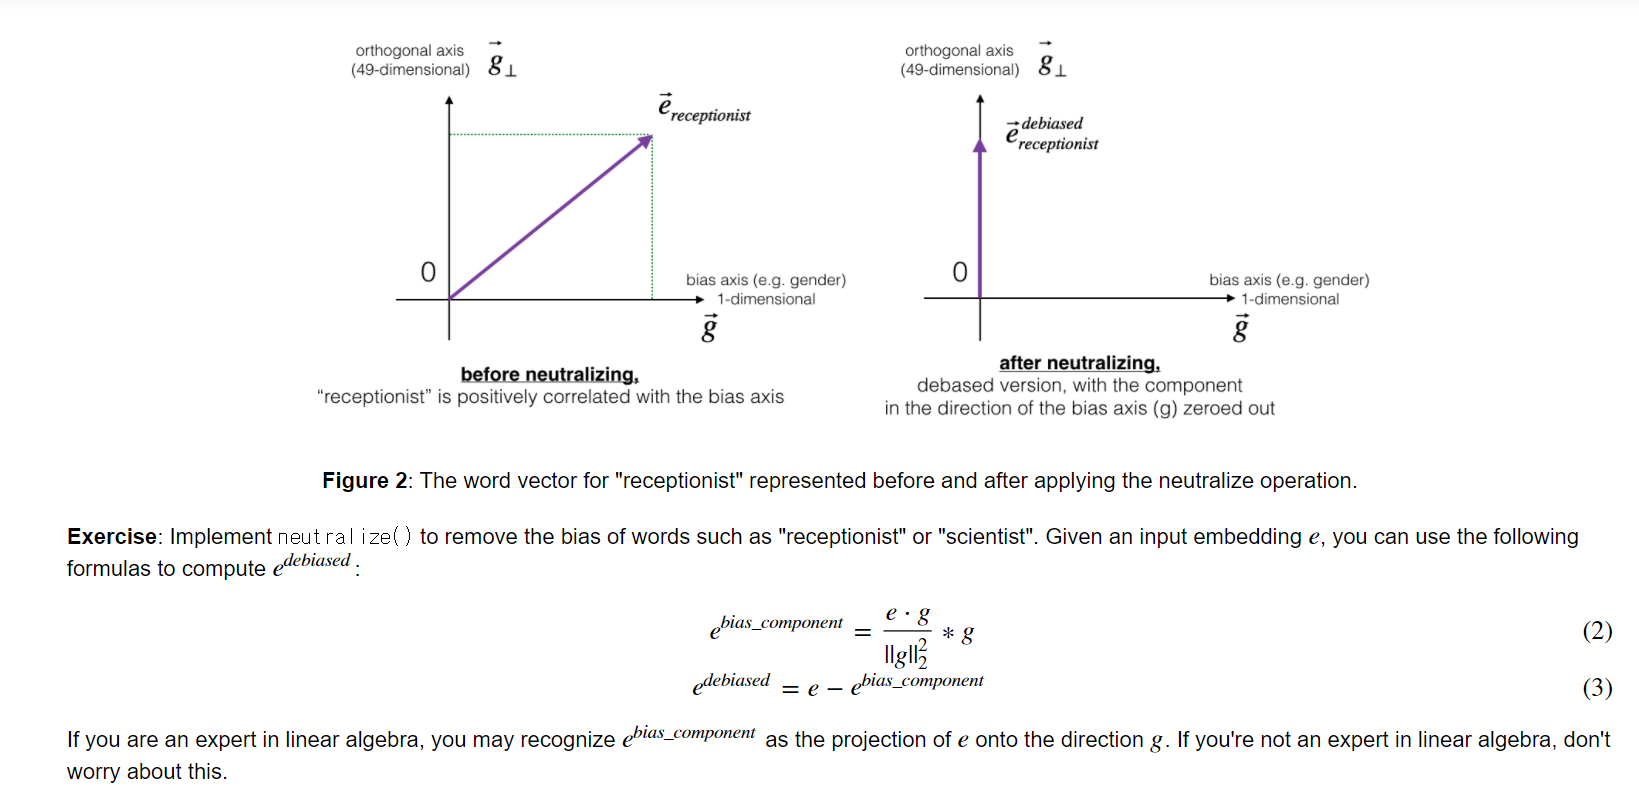
-
'receptionist' 와 같은 원래는 성적으로 중립적이어야 하나 편견으로 인해 그렇게 사용되고 있지 않은 단어들(definitional word가 아닌)은 Neutralize 해야한다.
-
이를 위해 위와 같이 워드 임베딩 벡터에서 다른 값들은 유지한 채 gender 값이 0이 되도록 수정해야한다. 그러기 위해서는 해당벡터를 gender 축을 제외한 다른 축에 정사영해야한다.
-
생략된 듯하지만 g 는 50차원의 벡터이며 오직 gender 축으로만 크기를 갖는 임의의 벡터이다.
-
e_bias 는 e를 gender 축으로 정사영한 벡터로서 (스칼라값) x (gender 축 방향 단위벡터) 이다.
-
gender 축 방향 단위벡터는 벡터 g를 벡터 g의 크기로 나누면 구할 수 있다.
-
다 계산해주면 캡쳐와 같은 공식이 나온다.
-
-
그리고 e_debiased 는 e + ( -e_bias )로 벡터의 덧셈을 해보면 위 캡쳐처럼 세로축에 정사영된 벡터가 된다.
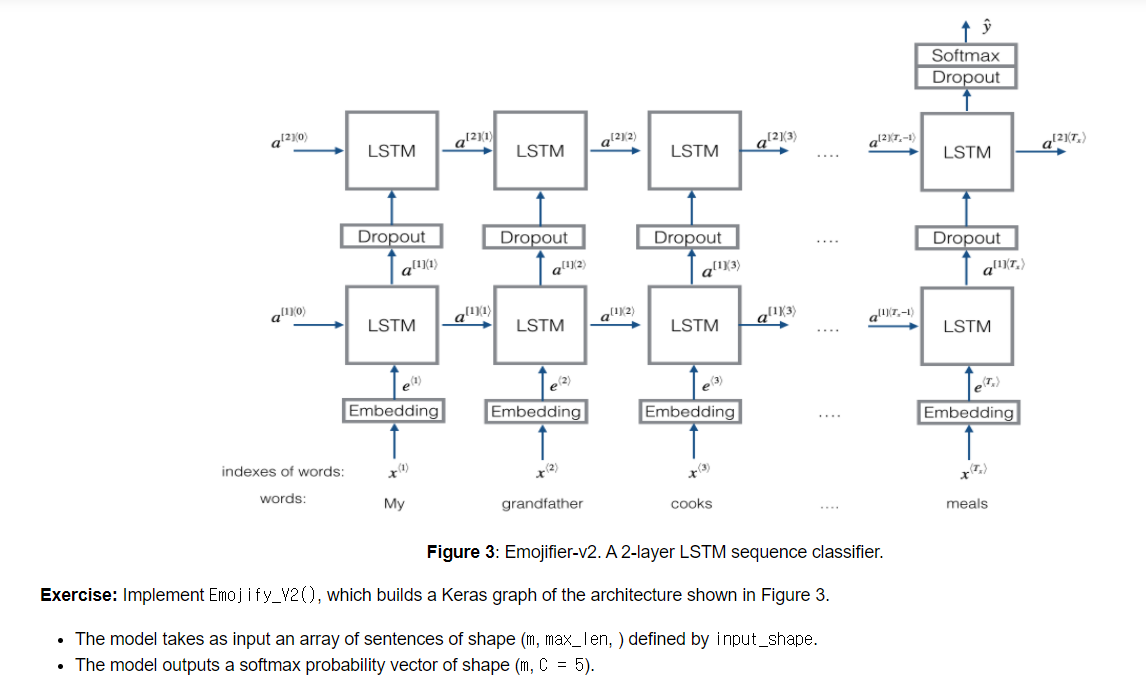
3. Word2vec using LSTM in Keras
1) Padding
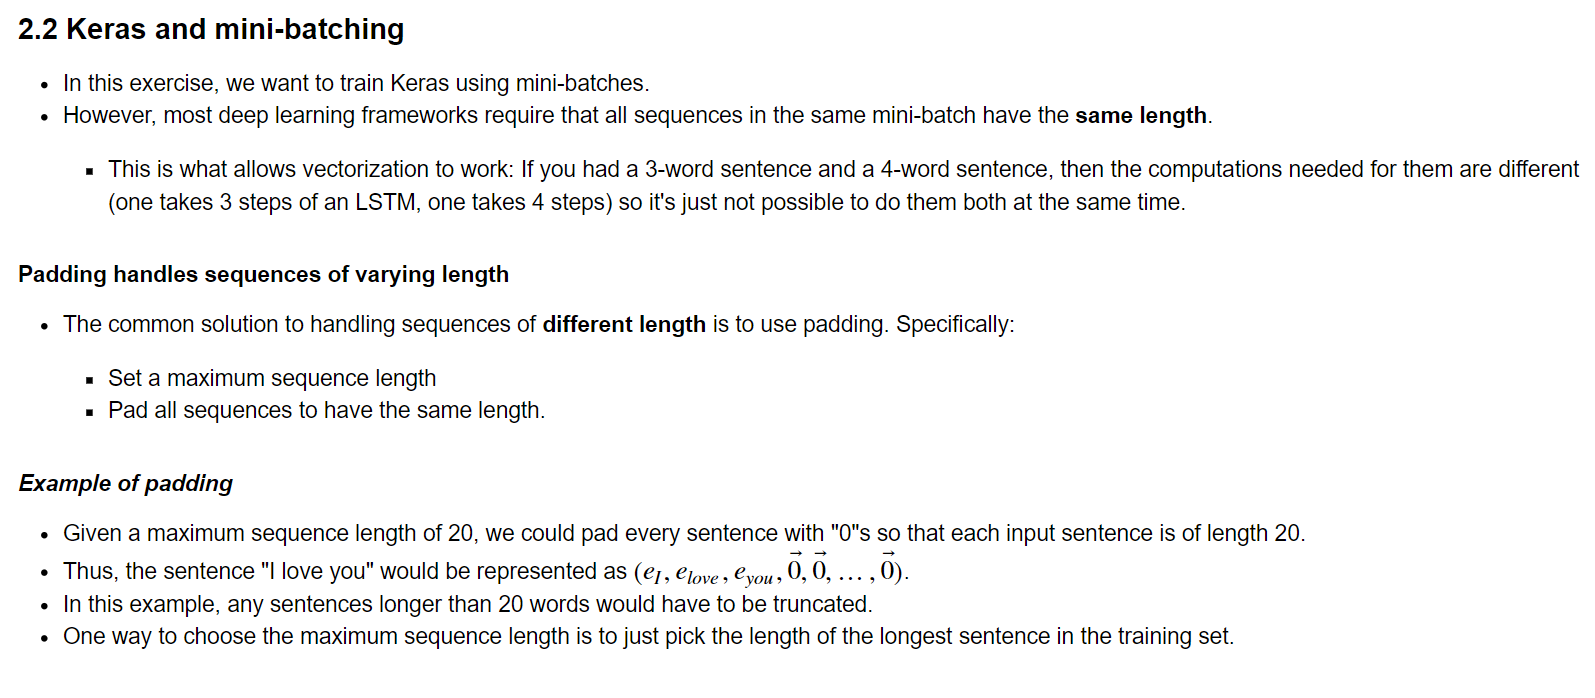
-
RNN의 특성상 시퀀스 데이터의 길이가 훈련데이터마다 달라지면 array 처리가 힘들다. 대부분의 딥러닝 프레임워크가 같은 길이의 시퀀스를 요구하는 이유다.
-
따라서 최대 길이의 시퀀스에 맞춰서 padding을 해준다.
2) Keras Layer 사용법
-
You may need to use the following Keras layers:
-
-
Set the shape and dtype parameters.
-
The inputs are integers, so you can specify the data type as a string, 'int32'.
-
-
-
Set the units and return_sequences parameters.
-
-
-
Set the rate parameter.
-
-
-
Set the units,
-
Note that Dense() has an activation parameter. For the purposes of passing the autograder, please do not set the activation within Dense(). Use the separate Activation layer to do so.
-
-
-
You can pass in the activation of your choice as a lowercase string.
-
-
Model Set inputs and outputs.
-
Additional Hints
-
Remember that these Keras layers return an object, and you will feed in the outputs of the previous layer as the input arguments to that object. The returned object can be created and called in the same line.
# How to use Keras layers in two lines of code
dense_object = Dense(units = ...)
X = dense_object(inputs)
# How to use Keras layers in one line of code
X = Dense(units = ...)(inputs)
-
The embedding_layer that is returned by pretrained_embedding_layer is a layer object that can be called as a function, passing in a single argument (sentence indices).
-
Here is some sample code in case you're stuck
-
raw_inputs = Input(shape=(maxLen,), dtype='int32')
-
preprocessed_inputs = ... # some pre-processing
-
X = LSTM(units = ..., return_sequences= ...)(processed_inputs)
-
X = Dropout(rate = ..., )(X) ...
-
X = Dense(units = ...)(X)
-
X = Activation(...)(X)
-
model = Model(inputs=..., outputs=...)
-
3) 순서
1. 먼저 sentence_to_indices(X, word_to_index, max_len) / return X_indices을 통해서 전체 훈련 셋 X의 각각 문장을 구성하는 단어들을 indices로 바꾸어준다. 그 과정에서 padding을 하여 공백은 0으로 한다.
ex) i 번째 훈련데이터 : "i like an apple" => [48, 6484, 9741, 48875, 0]
cf) 이를 통해 Embedding() 레이어에 인풋으로 집어넣을 수 있는 것.
2. pretrained_embeddding_layer(word_to_vec, word_to_index) / return embedding_layer 를 통해서 embedding layer 를 만들고 이리 다운받았던 embedding matrix를 해당 layer에 입력한다.
cf) 이 때 embedding layer를 만드는 케라스 함수 Embedding(input_dim = vocab_len, output_dim = emb_dim) 가 사용되며 해당 layer는 아까 잘 만들어놨던 indices들을 embedding vector로 만들어준다.
3. 그리고 Emojify_V2(input_shape, word_to_vec_map, word_to_index) / return model 을 만들어 기존 내장 레이어인 Input, LSTM, Dropout, Dense, Activation 그리고 만든 pretrained_embedding_layer로 전체 모델 구조를 만든다.
4. 그리고 훈련데이터를 fit 하면 끝.
4) parameters
-
LSTM의 return_sequences : True 이면 모든 timestep 에서 return 을 한다. False이면 마지막에 한번만!
-
Model의 inputs, outputs는 모두 케라스 레이어에 의한 텐서가 들어가야 한다.
5) code
# GRADED FUNCTION: Emojify_V2

def Emojify_V2(input_shape, word_to_vec_map, word_to_index):
    """
    Function creating the Emojify-v2 model's graph.

    Arguments:
    input_shape -- shape of the input, usually (max_len,)
    word_to_vec_map -- dictionary mapping every word in a vocabulary into its 50-dimensional vector representation
    word_to_index -- dictionary mapping from words to their indices in the vocabulary (400,001 words)

    Returns:
    model -- a model instance in Keras
    """

    ### START CODE HERE ###
    # Define sentence_indices as the input of the graph.
    # It should be of shape input_shape and dtype 'int32' (as it contains indices, which are integers).
    sentence_indices = Input(shape = (input_shape[0],), dtype = 'int32')

    # Create the embedding layer pretrained with GloVe Vectors (≈1 line)
    embedding_layer = pretrained_embedding_layer(word_to_vec_map, word_to_index)

    # Propagate sentence_indices through your embedding layer
    # (See additional hints in the instructions).
    embeddings = embedding_layer(sentence_indices)

    # Propagate the embeddings through an LSTM layer with 128-dimensional hidden state
    # The returned output should be a batch of sequences.
    X = LSTM(units = 128, return_sequences = True )(embeddings)
    # Add dropout with a probability of 0.5
    X = Dropout(rate = 0.5)(X)
    # Propagate X trough another LSTM layer with 128-dimensional hidden state
    # The returned output should be a single hidden state, not a batch of sequences.
    X = LSTM(128, return_sequences = False)(X)
    # Add dropout with a probability of 0.5
    X = Dropout(rate = 0.5)(X)
    # Propagate X through a Dense layer with 5 units
    X = Dense(units = 5)(X)
    # Add a softmax activation
    X = Activation('softmax')(X)

    # Create Model instance which converts sentence_indices into X.
    model = Model(inputs = sentence_indices, outputs = X)

    ### END CODE HERE ###

return model-
LSTM 을 두번 한 이유는 2층으로 쌓기 위해서